i3 window manager
Lately, a buddy of mine, joshtronic, has been getting back into the Linux world after a short hiatus using OSX. During this process, he has been trying different distributions as well as desktop environments and window managers. We both had a stint using xmonad for a while and we both really enjoyed using it. This time, he decided to try i3wm. This sort of inspired me to try it out myself as well... I figured I would make some notes on some of the things I did to get it in a usable state for myself.
The desktop
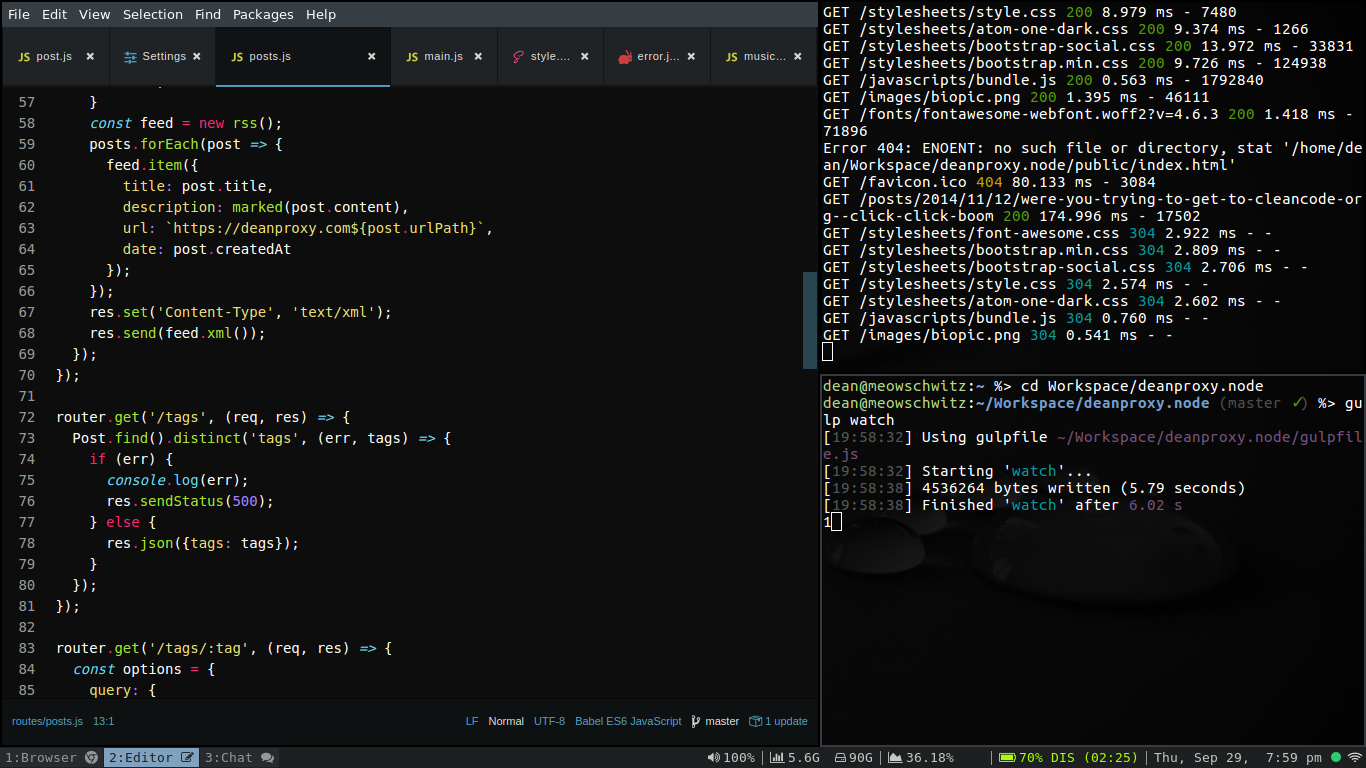
This is my desktop as it stands currently. I took a lot of my configuration for a great video series by Code Cast. This is a 3 part series that gives you the basics of i3, teaches you a few configuration options as well as how to "rice" up your instance.
The default i3 instance is pretty bland and minimalist. A lot of people like this. I personally prefer a bit more eye candy. I'm a bit of a dork like that. Anyway, here is a list of things I did to make my i3 setup a bit more to my liking. Feel free to copy anything if you like it, as I simply copied most of it from Code Cast!
1. GTK looks like Windows 95
This is the first thing I noticed when using i3 for the first time. I felt like I was using Win95. A lot of hard lines, no gradients and clunky looking controls. This is easily fixed by using the program lxappearance. On Ubuntu, this was already installed for me. All you have to do is run this program and it will open a nice GUI for you to pick the GTK theme of your liking.
2. dmenu or rofi...
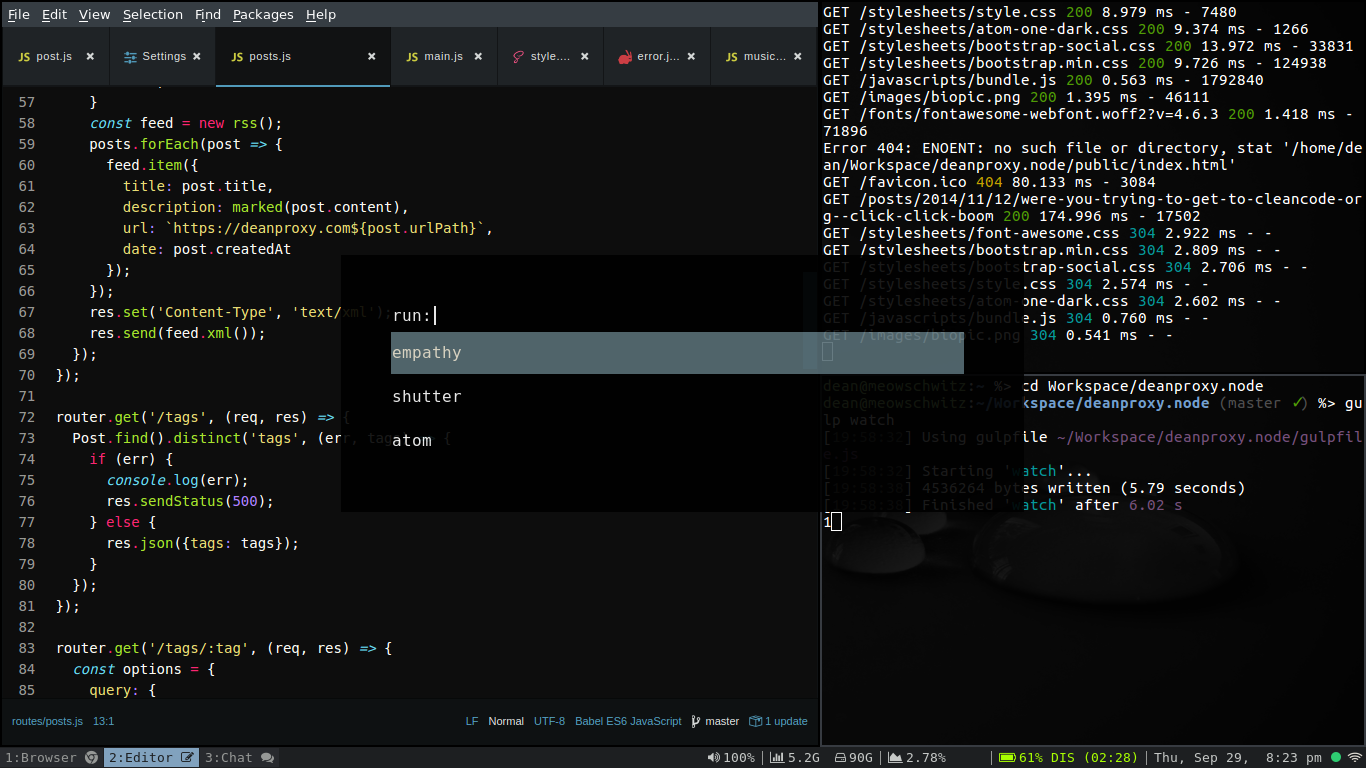
By default, you can press mod+d to open dmenu. This is a little bar that appears at the top of your screen that allows you to fuzzy find an application that's installed on your system and run it. There are many other options out there for this same functionality. You can use items like Gnome-Do, Kupfer or something simple like Rofi. I decided to use Rofi. On Ubuntu, this is as simple as doing an apt-get to install it. The next thing you'll want to do is update your i3 config so that when you hit your mod+d, it opens Rofi and not dmenu. My config was located in ~/.config/i3/config and if you open it, search for a line that runs dmenu_run and binds it to your $mod+d keys. Replace that line with the following, if you want your Rofi instance to look similar to mine:
bindsym $mod+d exec rofi -show run -lines 3 -eh 2 \
        -padding 50 -opacity 90 -bw 0 -bc "#000000"   \
        -bg "#000000" -fg "#ffffff" -h1bg "#000000" -h1fg "#9575cd"
3. Workspaces
By default, your work spaces will just have numbers. This may be okay for some, but I have specific work spaces for specific applications. For instance, I usually put my browser in work space 1, my coding stuff in work space 2 and chat stuff in work space 3.
I like to have some text in my work space declarations just for the heck of it. This just helps me remember what is where, even though I'd probably remember it anyway. It's still nice to look down and see that for a visual reference. There are a couple of things you need to do to make this happen.
1. make some variables
The i3 config lets you set variables. This is important so you aren't having to rewrite crap a lot, which comes in handy for work space declarations, because you have to write work space names in 2 locations.
Open your config and search for bindsym $mod+1 workspace and you will see the start of the work space declarations. Above this first line, I declared my variables for work spaces 1-3. Here is what this looked like:
set $ws1 "1:Browser "
set $ws2 "2:Editor "
set $ws3 "3:Chat "
The funny fonts are brought to you by font awesome. You will need to download this font and install it on your system to obtain these little icons. You can also opt to remove them if you don't like them. Or, if you'd rather have other icons, head over to the font awesome cheatsheet and find an icon you'd like to use, highlight it, copy and paste it into your config as needed.
2. Use said variables.
Secondly, we need to tell the work space to use these new names. The lines below will allow us to do this:
bindsym $mod+1 workspace $ws1
bindsym $mod+2 workspace $ws2
bindsym $mod+3 workspace $ws3
/* more bindsym stuff */

bindsym $mod+Shift+1 move container to workspace $ws1
bindsym $mod+Shift+2 move container to workspace $ws2
bindsym $mod+Shift+3 move container to workspace $ws3
/* more bindsym stuff for moving containers */
This uses the variables we have declared as what the work space will display in your i3 bar. don't forget to also do the bindsym for the container moving bindings. If you don't do this, you'll leave your system in a bit of a weird state.
Typically, after you update your i3 config, you should be able to just run $mod+Shift+r to reload your i3 config, but when dealing with work spaces, it appears to leave your system in a very strange state. It is recommended that you just log out and back in to see these changes properly.
3. Status bar
By default, the status information in your bar will be from the output of i3status. I decided to change this to use i3blocks, which provides a bit more configuration. I had to run apt-get to get i3blocks on Ubuntu. After that, I copied the config from /etc/i3blocks/i3blocks.conf into ~/.config/i3/i3blocks.conf and made some changes to that file.
The changes I made were to simply remove some items that I wasn't using and to use font awesome again to have some nice icons next to the displayed information rather than just text. Instead of showing you my entire i3blocks.conf file, let me just say, comment out any of the sections you don't want to use. The sections you do want to use, simply copy an icon from the font awesome cheatsheet I linked to above, find the section you want to change and simply change the label to your icon by pasting it in there. It will look similar to this:
[disk]
label=
interval=30
The next thing you'll want to do is reopen your i3 config file, search for the line status_command. It should be inside of a block called bar. It should be calling i3bar for its current status information. We want to change that to use i3blocks with our new config changes:
bar {
    status_command i3blocks -c /home/dean/.config/i3/i3blocks.conf
    tray_output primary
    /* colors and such... */
}
After you've done this, save your file and run mod+Shift+r to reload your i3 instance. You should see your i3 bar status looking a lot better now.
4. Media keys
This was a bit annoying for me. I feel like today, desktop environments should be able to work with and handle things that have been around for 15 something years. Such things are wifi, media keys (volume, play, pause, etc...) and screen brightness. Now, maybe this is entirely unfair because i3 isn't a desktop environment, but a simple window manager. However, you will need to tell i3 to bind specific keys to get volume and other similar keys to work.
First, install the applications pactl, xbacklight and playerctl. Secondly, add the following lines to your i3 config:
# Audio bindings
bindsym XF86AudioRaiseVolume exec --no-startup-id \
        pactl set-sink-volume 0 +5%
bindsym XF86AudioLowerVolume exec --no-startup-id \
        pactl set-sink-volume 0 -5%
bindsym XF86AudioMute exec --no-startup-id        \
        pactl set-sink-mute 0 toggle

bindsym XF86MonBrightnessUp exec xbacklight -inc 20
bindsym XF86MonBrightnessDown exec xbacklight -dec 20

bindsym XF86AudioPlay exec playerctl play-pause
bindsym XF86AudioPause exec playerctl play-pause
bindsym XF86AudioNext exec playerctl next
bindsym XF86AudioPrev exec playerctl previous
You may need to play with pactl to get the appropriate values to use. Change the 0 to a 1 or 2, etc... See what works for you on your system. Also, not that you may need to alter the battery script that i3blocks uses to display your volume information. In some instance, it will always show 100%. This wasn't the case for me.
5. Binding certain apps to certain work spaces
This is pretty straight forward. I want some apps to only open on specific work spaces. You can tell i3 to do this with the following config changes:
assign [class="google-chrome"] $ws1
assign [class="Atom"] $ws2
assign [class="Empathy"] $ws3
6. Easy wifi setup
i3 doesn't come with a nice wifi status app so you can connect or switch wireless spots easily. You can either opt to do this all in the command line, or use nm-applet. I choose to use nm-applet because it's straight forward and quick to use when I'm switching networks or diagnosing whether or not I have any wifi signal. If my internet connection feels sluggish, it's much nicer to just glance down at my status bar and go "oh, okay... wifi signal is kinda shitty" than open a terminal and type commands to see what's going on.
Simply install nm-applet and then edit your i3 config with the following line:
exec --no-startup-id nm-applet
You should see a little wifi icon pop up in your i3 bar on the right side. You can click this and get your wifi settings quickly as well as see your signal status.
7. Transparency
i3 doesn't do transparency. So, Rofi and anything that you're used to having some transparency effect to will be completely opaque. To change this, simply use compton. I had to install this application again. After it's installed, tell i3 to start it up with this line in your i3 config:
exec --no-startup-id compton -f
This also gives the added benefit of getting some nice transition effects between work spaces or when you open/close applications. Log out and back in. You should now have your transparency effects!
8. Background image
This isn't done by i3 either. You must use an application to set your background images. I used feh and a simple apt-get to install it worked for me. After that, open your i3 config and add this line:
exec --no-startup-id feh --bg-scale /path/to/background.png
That's all
Pretty much all I did to setup my environment. You can get into things like themes and colors. Just search around and you'll see some themes you can install to get you started. Other than that, you'll have a decent looking i3 setup with these options!